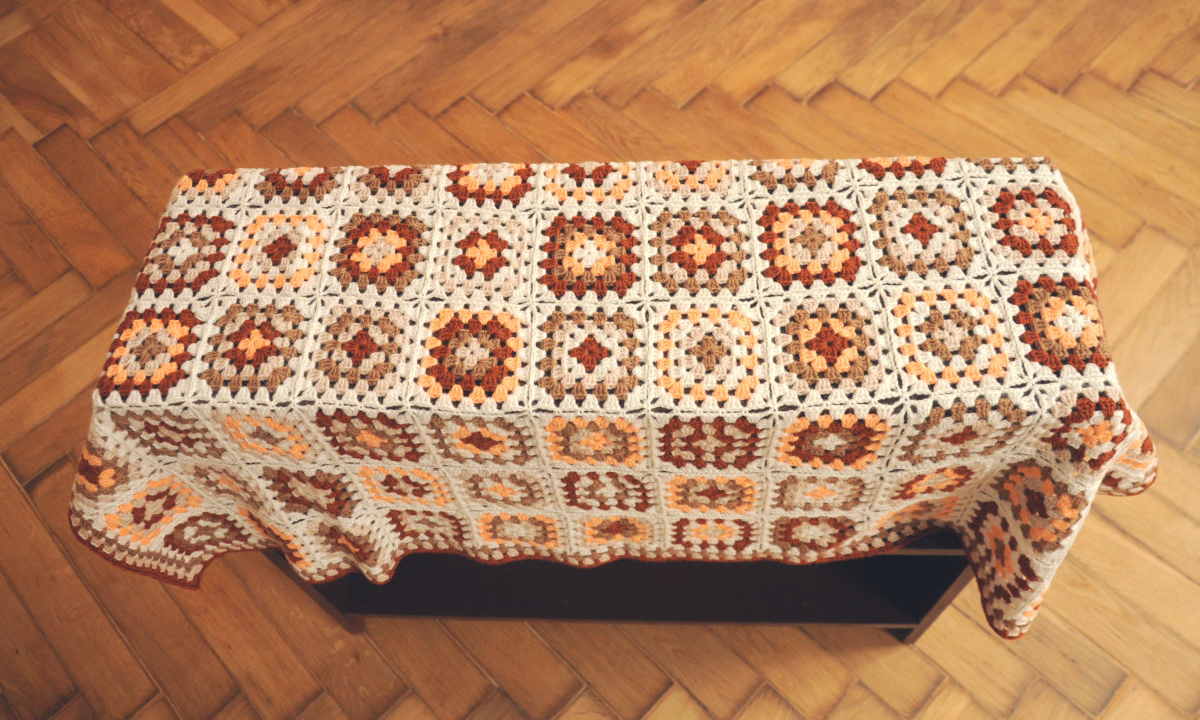
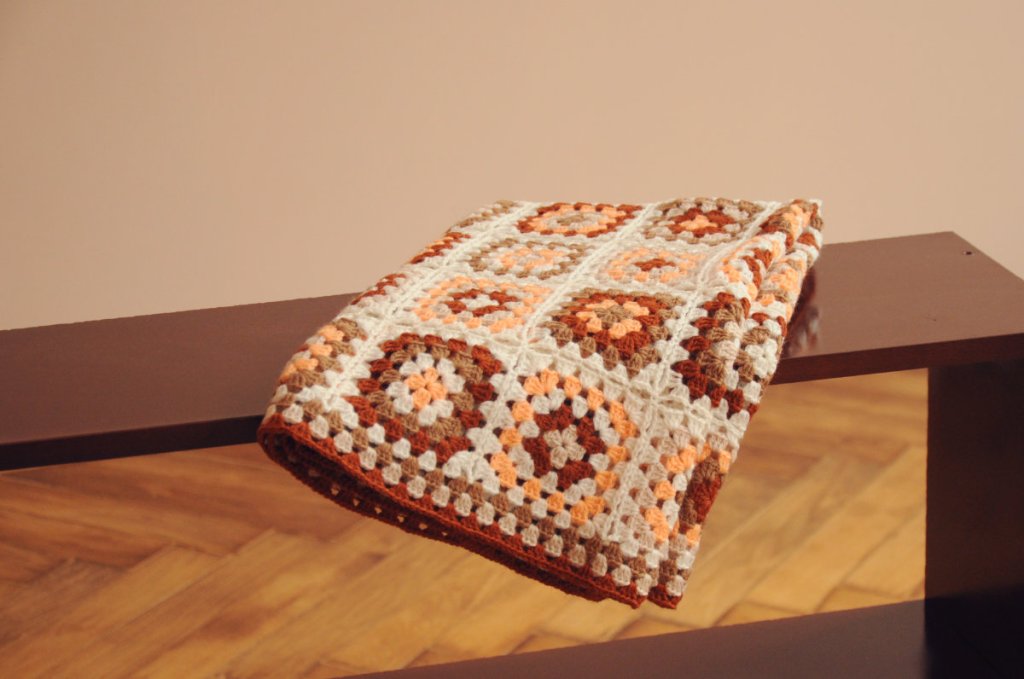
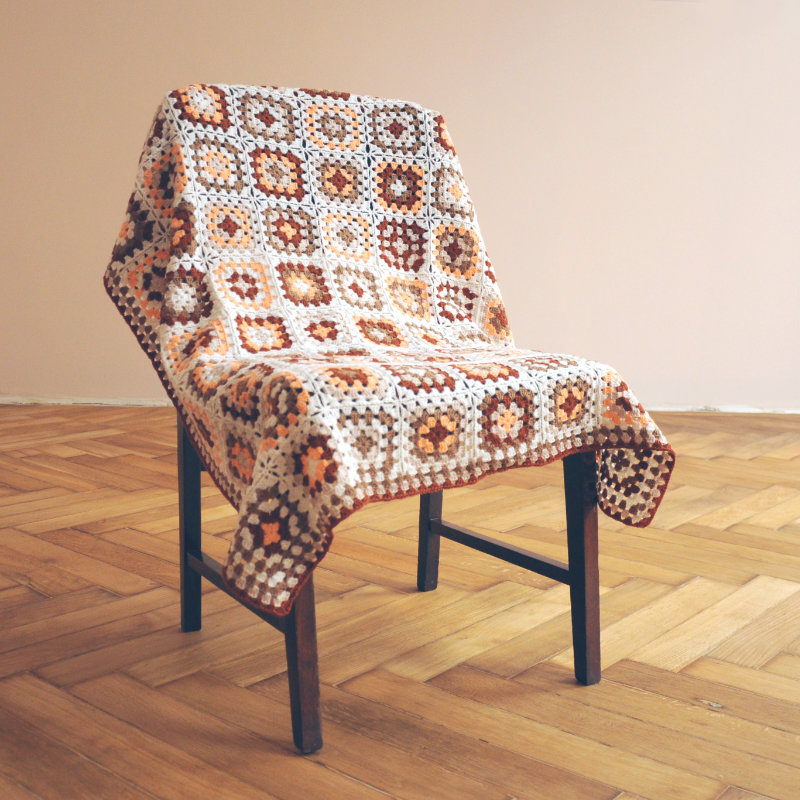
This colorful lightweight blanket is composed of classic granny square motifs joined into a rectangular shape, then finished with a simple granny stitch edging for a clean, stable border.
Designed with a calm, repetitive workflow, it’s an approachable project for beginners while still satisfying for experienced makers looking for a relaxing, stash-friendly make.
The finished blanket features a timeless patchwork look with warm, earthy tones — ideal for modern nurseries, baby showers, or handmade gifts. Its modular construction also makes it portable and convenient for travel or on-the-go crafting.
Suitable for a range of yarn choices within the same weight category, this pattern creates a cozy, breathable fabric with gentle texture and soft drape — perfect for everyday use.
SKILL LEVEL
Easy, suitable for adventurous beginners
TOOLS & MATERIALS
- Total of 11 1.75oz/50g skeins of a 4-ply or Fingering weight yarn (about 270yds/250m in 1.75oz/50g) in 5 colors: 3 skeins in background color and 2 skeins in each of the other colors
- US size 6 (G) / 4mm crochet hook
- measuring tape, tapestry needle, blocking tools
Suggested yarn: Cascade Yarns 220 Fingering, colors: White (8505), Beige (8021), Rose Cloud (1065), Walnut Heather (8013), Ember Heather (9619).
FINISHED DIMENSIONS
The following measurements were taken off the finished blanket, laid flat and unstretched, after blocking:
Width: 43″/109cm
Length: 52″/132cm
GAUGE
One 5-rnd square motif after blocking:
4½” x 4½” / 11.5cm x 11.5cm
The gauge is provided for reference. Getting the exact gauge is not critical for this project but difference may affect finished item dimensions and yarn consumption.
ABBREVIATIONS (US Crochet Terms)
sl st – slip stitch
ch – chain
sc – single crochet
dc – double crochet
rnd(s) – round(s)
st(s) – stitch(es)
sp(s) – space(s)
BOR – beginning of round
SC JAYGO – single-crochet join-as-you-go
[ ] — repeat instruction within square brackets as stated afterwards
* – repeat instruction from asterisk as stated afterwards
PATTERN NOTES
The blanket is worked by preparing a number of separate granny square motifs, joining them together into a rectangular shape, and adding a simple edging around the perimeter of the rectangle to stabilize the shape and provide a clean finish. Construction is intentionally straightforward, making the process calm, repetitive, and suitable for beginners.
WORKING INSTRUCTIONS
Prepare the motifs
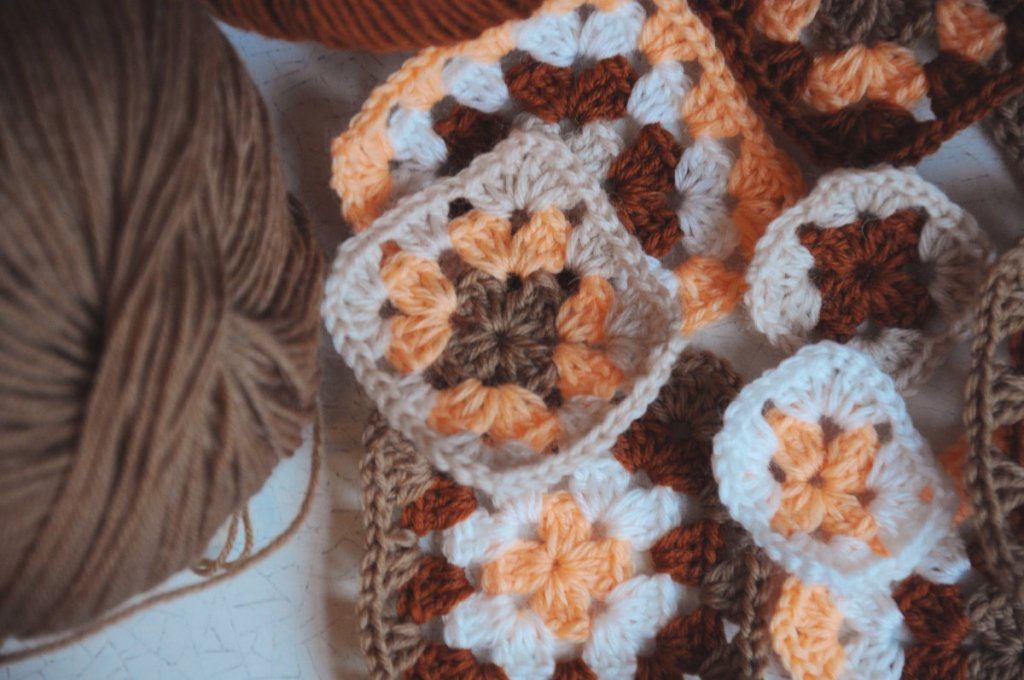
According to the Square Motif instructions below, prepare 99 square motifs, each consisting of 4 rounds.
Work all motifs with the right side facing and use a different color for every round. After completing a round, break yarn, fasten off, and weave in all loose ends. Then attach the next color in any corner ch sp. These corner spaces where yarn is attached are referred to as BOR in the instructions below.
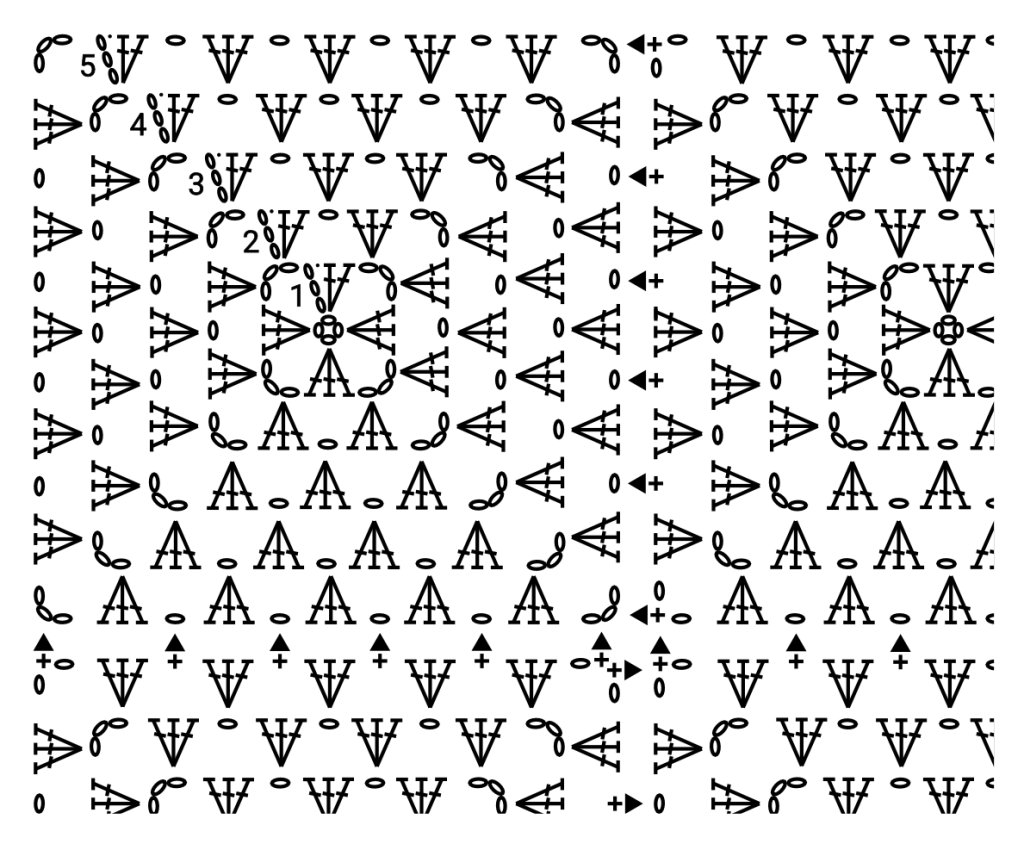
Square Motif
Ch 4 and join with sl st to make a ring (or work a magic circle).
Rnd 1 Ch 6, * 3 dc in ring, ch 3 – rep from * 2 more times, 2 dc in ring, join with sl st in 3rd ch of ch-6.
Rnd 2 Ch 6, 3 dc in BOR sp, ch 1, * (3 dc, ch 3, 3 dc) in next corner ch sp, ch 1 – rep from * 2 more times, 2 dc in BOR sp, join with sl st in 3rd ch of ch-6.
Rnd 3 Ch 6, 3 dc in BOR sp, ch 1, * 3 dc in next ch-1 sp, ch 1, (3 dc, ch 3, 3 dc) in next corner ch sp, ch 1 – rep from * 2 more times, 3 dc in next ch-1 sp, ch 1, 2 dc in BOR sp, join with sl st in 3rd ch of ch-6.
Rnd 4 Ch 6, 3 dc in BOR sp, ch 1, * [3 dc in next ch-1 sp, ch 1] to last ch-1 sp before next corner, (3 dc, ch 3, 3 dc) in next corner ch sp, ch 1 – rep from * 2 more times, [3 dc in next ch-1 sp, ch 1] to last ch-1 sp before final corner, 2 dc in BOR sp, join with sl st in 3rd ch of ch-6.
KEY


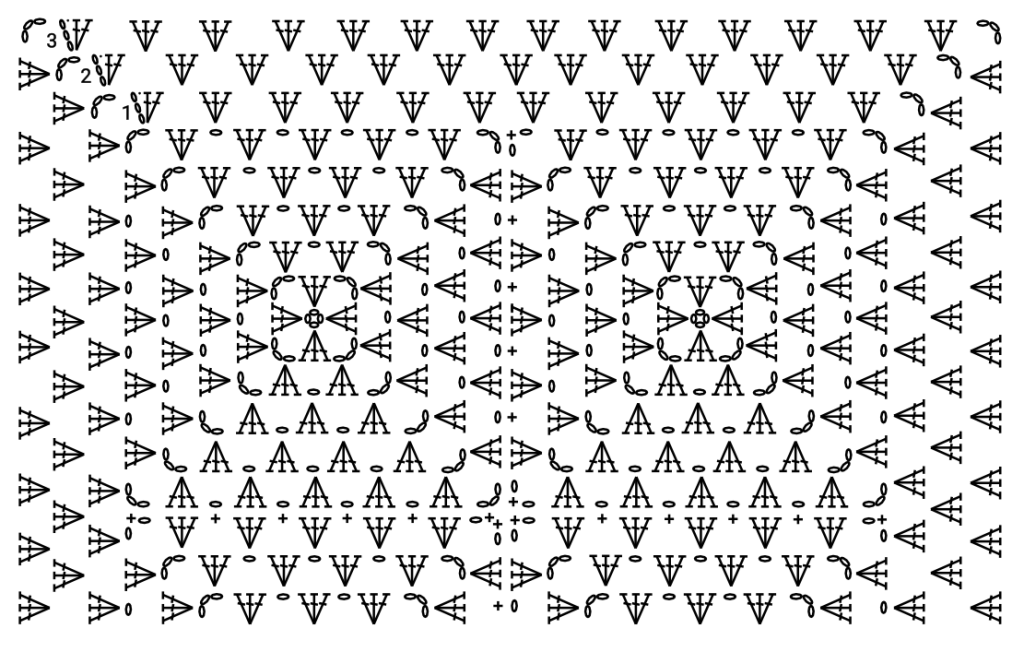
Join the motifs
Place the motifs in a rectangular 9 x 11 layout and join them together with the background color yarn, continuously, without breaking yarn.
Attach the joining color yarn in any external corner of the layout and work the 5th round around the square motifs joining them together as you go (see my tutorial on continuous SC JAYGO here).
Work the Edging
When your squares are joined together into the rectangle, work three rounds in contrasting colors around the entire perimeter to even out its edges and add a neat finishing touch.
Attach yarn in any of the rectangle’s corners and work:
Edging Rnd 1 Ch 6, 3 dc in BOR sp, * [3 dc in next ch sp] to last ch-1 sp before next corner of the rectangle, (3 dc, ch 3, 3 dc) in corner sp – rep from * 2 more times, [3 dc in next ch sp] to last ch-1 sp before BOR corner, 2 dc in BOR sp, sl st in 3rd ch of ch-6. Break yarn, fasten off, and weave in ends.
Attach next yarn in any of the rectangle’s corners and work:
Edging Rnd 2 Ch 6, 3 dc in BOR sp, * [3 dc in sp after next 3 dc] to last such sp before next corner of the rectangle, (3 dc, ch 3, 3 dc) in corner sp – rep from * 2 more times, [3 dc in sp after next 3 dc] to last such sp before BOR corner, 2 dc in BOR sp, sl st in 3rd ch of ch-6. Break yarn, fasten off, and weave in ends.
Attach next yarn in any corner and rep Edging Rnd 2 one more time.
Block your finished blanket for best results.
☼☼☼
Show me the photos of your blankets here in comments, or share your work on social media with the tag #zorancrochets, and welcome back for more fun projects! 🙂