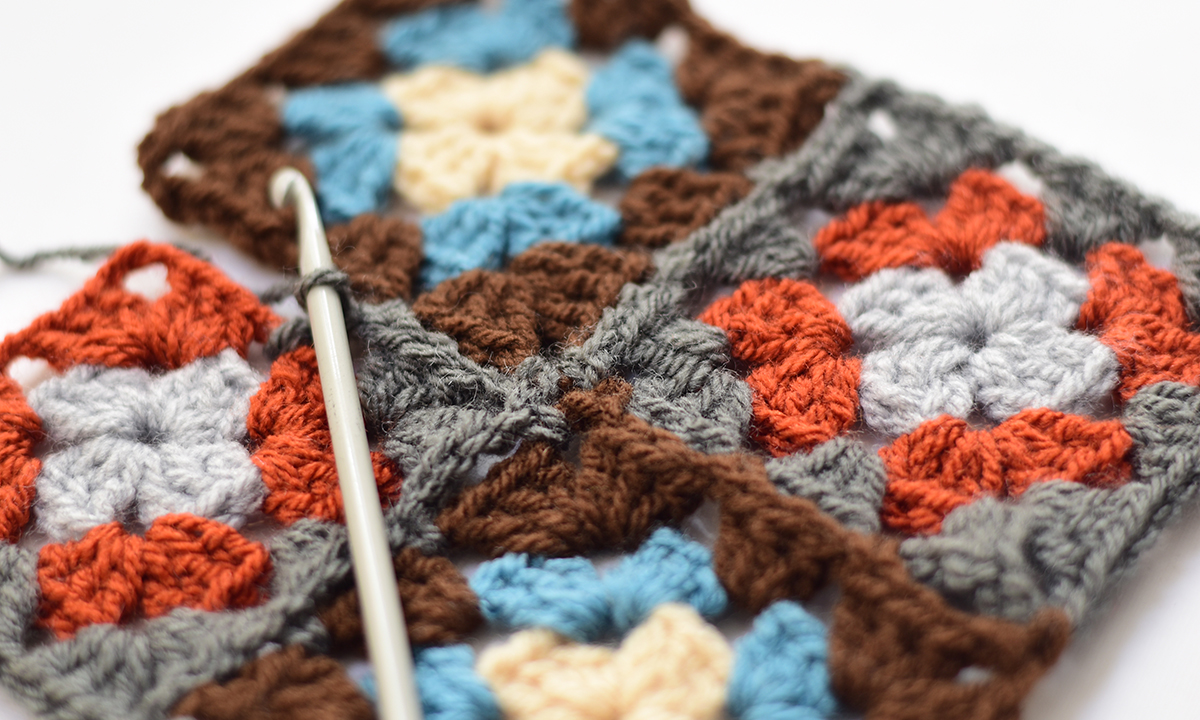
In this tutorial, I’m describing the joining of classic granny square motifs I use in my patterns. Motifs are joined together with the join-as-you-go (JAYGO) method as you work their last row or round, no sewing is required.
The first motif is always worked in full as specified in the motif instruction. The other motifs are worked the same until they have to be attached to the previously worked motifs. Then you work according to the joining instruction, replacing the specified chain stitches in the last row or round with single crochets worked into the appropriate spaces of previously worked motif(s).
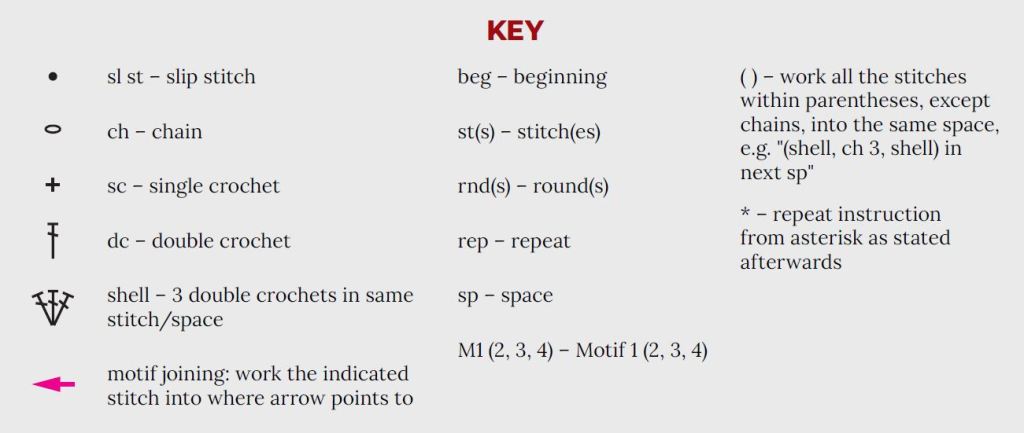
Please note that I use US terminology in my crochet patterns and tutorials.
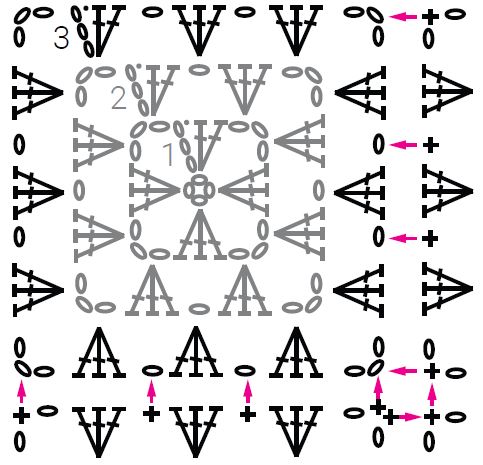
classic 3-rnd granny square
Ch 4 and join with sl st to make a ring.
Rnd 1 Ch 6, * shell in ring, ch-3 – rep from * 2 more times, 2 dc in ring, join with sl st in 3rd ch of ch-6.
Rnd 2 Ch 6, shell in same corner sp, ch 1, * (shell, ch 3, shell) in next corner sp, ch 1 – rep from * 2 more times, 2 dc in first corner sp, join with sl st in 3rd ch of ch-6.
Rnd 3 Ch 6, shell in same corner sp, ch 1, * shell in next ch-1 sp, ch 1, (shell, ch 3, shell) in next corner sp, ch 1 – rep from * 2 more times, shell in next ch-1 sp, ch 1, 2 dc in first corner sp, join with sl st in 3rd ch of ch-6.
Your motif is finished!
Step-by-step Joining instructions
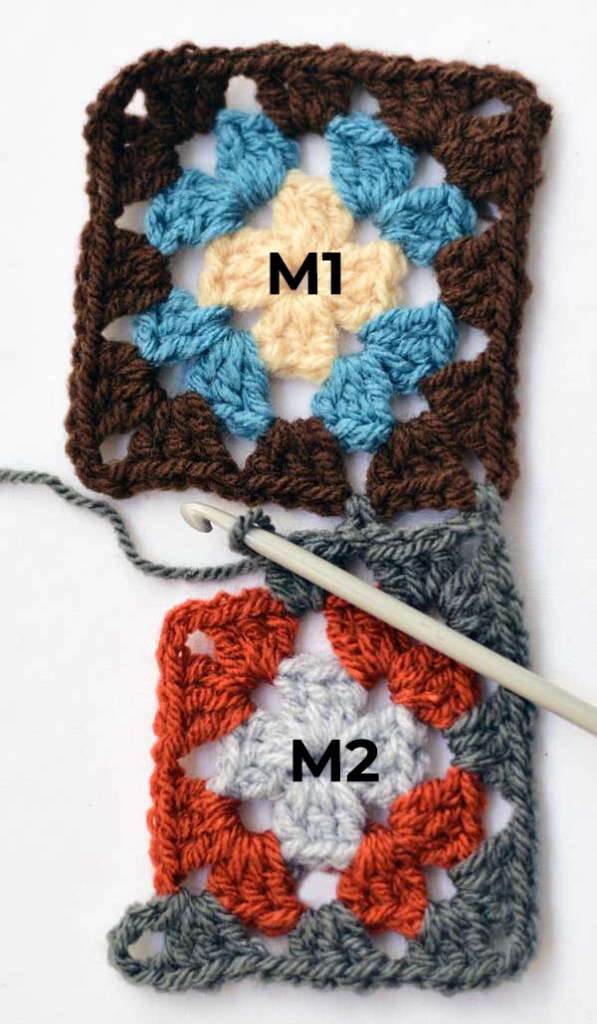
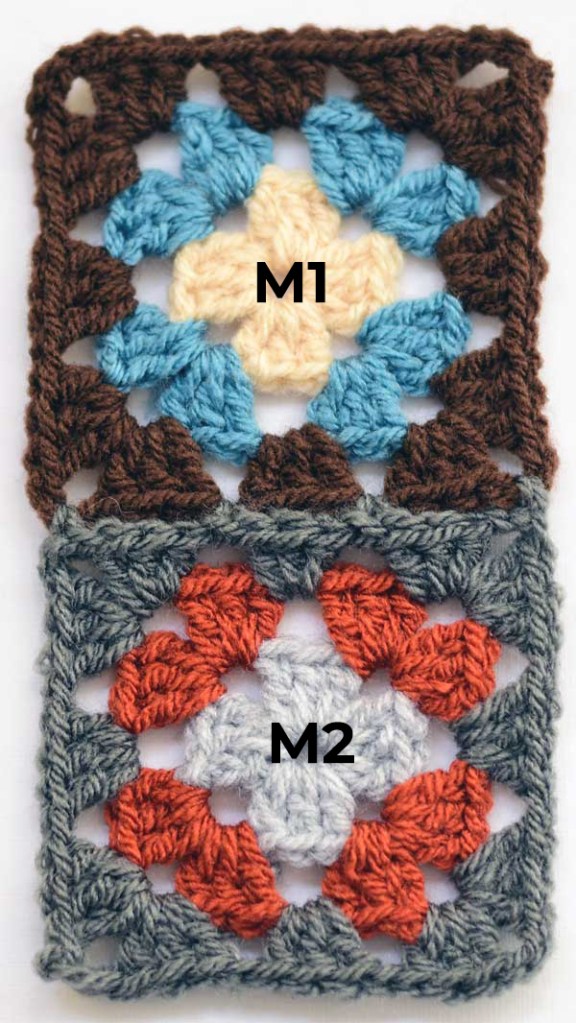
Motif 1 (M1):
Work M1 entirely as specified in the Classic Granny Square instruction above.

Motif 2 (M2):
Rnds 1-2 Work as specified in the Classic Granny Square instruction above.
Note: as you are joining your motifs together, make sure they are facing the same side (wrong sides held together).
Rnd 3 (joining) Ch 6, shell in same corner sp, ch 1, shell in next ch-1 sp, ch 1, (shell, ch 3, shell) in next corner sp, ch 1, shell in next ch-1 sp, ch 1, shell in next corner sp, ch 1, sc in corresponding corner sp of M1, ch 1, shell in same corner sp of M2, sc in next ch-1 sp of M1, shell in next ch-1 sp of M2, sc in next ch-1 sp of M1, shell in next corner sp of M2, ch 1, sc in next corner sp of M1, ch 1, shell in same corner sp of M2, ch 1, shell in next ch-1 sp of M2, ch 1, 2 dc in first corner sp of M2, join with sl st in 3rd ch of ch-6.
Motif 3 (M3):
Rnds 1-2 Work as specified in the Classic Granny Square instruction above.
Rnd 3 (joining) Ch 6, shell in same corner sp, ch 1, shell in next ch-1 sp, ch 1, (shell, ch 3, shell) in next corner sp, ch 1, shell in next ch-1 sp, ch 1, shell in next corner sp, ch 1, sc in corresponding corner sp of M2, ch 1, shell in same corner sp of M3, sc in next ch-1 sp of M2, shell in next ch-1 sp of M3, sc in next ch-1 sp of M2, shell in next corner sp of M3, ch 1, sc in next corner sp of M2, ch 1, shell in same corner sp of M3, ch 1, shell in next ch-1 sp of M3, ch 1, 2 dc in first corner sp of M3, join with sl st in 3rd ch of ch-6.

Motif 4 (M4):
Rnds 1-2 Work as specified in the Classic Granny Square instruction above.
Rnd 3 (joining) Ch 6, shell in same corner sp, ch 1, shell in next ch-1 sp, ch 1, shell in next corner sp, ch 1, sc in corresponding corner sp of M3, ch 1, shell in same corner sp of M4, sc in next ch-1 sp of M3, shell in next ch-1 sp of M4, sc in next ch-1 sp of M3, shell in next corner sp of M4, ch 1, sc in next corner sp of M3, sc in adjacent corner sp of M1, ch 1, shell in same corner sp of M4, sc in next ch-1 sp of M1, shell in next ch-1 sp of M4, sc in next ch-1 sp of M1, shell in next corner sp of M4, ch 1, sc in next corner sp of M1, ch 1, shell in same corner sp of M4, ch 1, shell in next ch-1 sp of M4, ch 1, 2 dc in first corner sp of M4, join with sl st in 3rd ch of ch-6.


Continue adding as many motifs as required in the same manner.

This is the end of the tutorial. I hope you’ve enjoyed it! I learned the above method long ago from my grandma when she started teaching me the basics of crocheting, and it’s been my favorite ever since. You may prefer using different techniques of joining crochet motifs, but for working my patterns specifically, I do recommend this effortless method to get the result as pictured in my projects.
☼☼☼
One response to “Joining Crochet Motifs Together (Part 1)”
[…] motif is the classic granny square described in detail in my previous tutorial, where I also explained the single crochet join-as-you-go method of motifs joining. In this […]